Tuesday, May 7, 2024
Home Blog Page 2

Summiting Mt. Mitchell (6,684 ft.) – Highest Mountain East of the Mississippi

0

Mt. Mitchell (6,684 ft./ 2,037m) is the tallest mountain, east of the Mississippi, and the perfect peak to hike for virgin baggers. It is in  Pisgah National Forest, near Burnsville, NC, and part of the Appalachian Mountains.

Colliding tectonic plates created the Appalachian Mountains and at one time, they were as tall as the Rocky Mountains out west. Billions of years of erosion have whittled their height in half.

Today, Mt. Mitchell is the loftiest among the Appalachians and a popular peak to summit.

Mt. Mitchell Trail:

The most common hike to the top is the Mt. Mitchell Trail, a 12-mile round-trip trek with 8,000 ft. of elevation gains and losses. Following blue diamond trail markers/blazes, the trek

starts and finishes at Black Mountain Campground (2,680 ft.).

Tip: If you are not staying at Black Mountain Campground, park for free, on the side of the road outside the entrance. For $5, you can park inside the campground and this includes a post-hike shower. 

The ascent is a gradual meander on hard packed dirt and roots through a lush forest, filled with spruce, pine and rhododendron. There are a couple long-distance views, between switchbacks, but otherwise, the entire trek is spent in the forest. Only in the last hundred yards do you emerge above the tree-line and onto a pathway that leads to the touristy observation deck and applicable sign marking the location.

Tip: Unless you hitchhike (which is not recommended), there is no transportation from the summit. If you hike up Mt. Mitchell, you better be able to hike down.

The trek is considered a Class 1 (easy) climb. No scrambling or climbing required. That being said, the Mt. Mitchell State Park website states that this is a ‘strenuous hike’ and requires 8-hours to complete it.

We did not find it strenuous. It took us 6-hours RT. This included a couple water/snack breaks and twenty-minutes at the top taking in the views. Elevation gains are spread-out over 6-miles. It is just a long 12-miles round-trip hike on your feet.

You do need to be in good physical condition and prepared. Wear appropriate footwear, carry water and an extra layer of clothing – it gets chilly at the top.  This is a trail I’d recommend for kids, but be ready to take more breaks. 

Tips:

  • If running the trail, it should take 4-hours RT. If hiking, it should take 6-8-hours RT depending on pace and frequency/length of breaks.
  • You can also do the trek in 2-days by camping. There are primitive campsites along the trail, at miles 3.1 and 4.3 (Commissary Hill).

We went in early Fall and it was still warm. It started out in the 70’s F, but temperatures dropped to low 60’s F at the top. We had sunny skies and excellent views at the summit. In the distance, clouds started forming and we encountered rain showers on the way down. This made the trail a little slippery.

My recommendations on how to go light and fast on the Mt. Mitchell Trail.

  1. Carry a small backpack (ex. Ultimate Direction FASTPACK 15)
  2. 2 liters of water (there are a few small streams, but you’d better have a SteriPen or LifeStraw filter to purify the water.)
  3. Electrolyte powder to add to water and snacks (ex. TME Bars)
  4. Light Rain Jacket (ex. Adidas Terrex Fastpack 2.5L Jacket)
  5. Compact Sunglasses (ex. Poptical’s Popstars)
  6. Trekking Poles (ex. Leki Micro Vario Carbon)
  7. Comfortable shoes with good traction (ex. UA Horizon 50)

This blog, ‘Summiting Mt. Mitchell – The Highest Mountain East of the Mississippi,’ was written for Poptical Sunglasses (PACK SMALL. LIVE BIG.) by Payge McMahon.

Fun Comparison: Appalachian Mountains vs. Poptical Sunglasses

Like the Appalachian Mountains to the Rocky Mountains, Popticals are half the size of regular sunglasses.

Similarly, to tectonic plates shifting, Popticals compactability is created by a sliding track system which allows the lenses to parallel each other.

Unlike the Appalachian Mountains, Popticals won’t erode through time. They are made from a durable, corrosion and rust proof material, guaranteeing long-lasting functionality.  


REVIEW: Pike Trail Pocket Blanket

0

Overview

The Pike Trail Pocket Blanket is light weight, compactable, waterproof and multi-functional. Keep it in the trunk of your car or put it in a backpack. It can be used as a blanket, shelter or ground tarp. Great for the beach, mountains, backyard or your kid’s next soccer game.

Pros

Small enough to fit in large pockets

Waterproof

Handy stake loops & four corner anchor pockets

Cons

The included carrying case/stuff sack is a little small.

TIP: It works best if you attempt to fold the blanket as small as possible vs. just stuffing it into the case/sack.

Field Functionality & Design Features

As mountain climbers, backpackers, ultramarathon runners and everyday active people, the Pike Trail blanket proved itself to be highly versatile and convenient.

The reinforced, waterproof, rip-stop nylon blanket expands to 56” x 60”. We used it as a ground tarp to sit on (ideal for 2 adults) and as a place to store our gear when camping. Sticks and rocks did not puncture it. If the ground is wet, the waterproof blanket will keep your butt and/or gear dry. It also makes a nice shelter/ tarp for a hammock.

The four corner pockets and stake loops give the user options when wanting to anchor or hang the blanket.

Price: $17.98

Buy


16 Days of Adventures on New Zealand’s South Island

0

We wanted an active, New Zealand adventure and in February 2017, we spent sixteen days on the South Island. We hiked 10 different treks, over 110 miles, with 34,000 feet of elevation gains and losses.

We tramped in the Southern Alps, along Franz Josef Glacier and climbed to the summit of Avalanche Peak. We completed two of NZ’s nine, famous hut-to-hut, Great Walks (Kepler and Milford Tracks) and strolled along the beaches of the Tasman Sea.

We drank wonderful New Zealand wine, ate lamb, venison pies, green mussels and these wonderful dessert cookies called, Tim Tams.

We drove a total of 1,300 miles, in a campervan, from Queenstown to Mt. Cook, Arthur’s Pass, the West Coast and Fiordland National Park. We mastered driving on the left-hand side of the road, New Zealand’s one lane bridges, roundabouts and windy roads.

I’m not gonna lie, planning this trip was challenging. Going in peak season, limited time, obtaining reservations and then once there, weather didn’t always cooperate. That being said, it was a fun and exciting adventure!

To help others, wanting to travel to New Zealand, we put together a list of our best decisions, favorite, least favorite, biggest challenges, surprises, cool spots, over-rated and wish we would have… trip highlights. I’ve also written three additional blogs, with tips, on our experience trekking the Milford Track, Kepler Track & Mueller Hut Route.

My Blogs on Individual Hikes:

Milford Track 

Kepler Track

Mueller Hut Route

Best Decisions: EasyHike & Britz Campervan 


EASYHIKE is an adventure travel logistics company that helped us secure hard-to-get reservations on the Milford Track. EasyHike offers several Great Walk packages for travelers who don’t want to stress over logistics, have proper clothing/gear or time to shop for food supplies. They can provide all these things. They saved us time, money and stress.

Rent a BRITZ CAMPERVAN! Staying in hotels every night is expensive and requires booking ahead of time. There were many cold, windy and rainy nights, tent camping would have been miserable. The campervan was easy to drive, roomy, had a comfy bed (linens provided) for two, a refrigerator, a little pull out gas stove and sink. We’d come back from hiking, make ourselves a little dinner, pour some wine and enjoy the sunsets.

Favorite Day Hike: Mueller Hut Route in Aoraki/Mt. Cook National ParkHands down, this trek was our favorite!

It is a scenic 6.5-mile, 6-8-hour round trip hike that takes you up and down 6,800 feet of elevation to a summit of 5,900 ft., where the bright red Mueller Hut sits alone, high among the rocks, boulders and snow fields in the Sealy Range of Aoraki/Mt. Cook National Park.

The panoramic views are spectacular; glaciers, lakes, ice cliffs and snow covered mountains, including Mt. Sefton and New Zealand’s tallest, 12,316 ft. Mt. Cook.

Note: Most guide books recommend taking two days for this trek and spending the night at the hut. Limited on time, we easily did it in a day. Read my Mueller Hut Route Blog for more details!

Favorite Great Walk: Kepler Track 

The Kepler Track was my favorite of the two Great Walks. The other, the very popular Milford Track, had similar scenery, but none of the breathtaking ridgeline views that make the Kepler Track unique.

It is an easy trek to plan because it is a loop. Located in Fiordland National Park, the 37 mile/ 60km loop, with 8,900 ft./2,700 m elevation gains and losses, starts and finishes a few short miles outside the charming lakeside town of Te Anau. The hike is known for endless ridgelines and alpine views. It is traditionally done in 3-4 days, but if you are short on time and in good shape, it can be completed in 2-days. Read my Kepler Track Blog for more details!

Hardest Hike: Avalanche Peak Track 

Avalanche Peak Track in Arthur’s Pass National Park is a steep, thigh-crushing, 6.2-mile loop trail (if going down via Scott’s Track) to a 6,014-ft. summit with 7,000 ft. of elevation gains and losses. Once above the bush-line, a rugged ridge to the summit turns into a narrow scramble over sheer rocks and avoiding deadly drop-off cliffs.

The weather changes drastically, so be prepared. If you are in good shape and not afraid of heights, the panoramic views of the Southern Alps are worth the effort!

Biggest Challenge: Weather & Sandflies 

Apparently, it rains a lot in New Zealand – over 200-days a year in some South Island areas – and weather didn’t always work with the itinerary. Due to low-cloud cover, our scheduled Heli-Ice Climbing Adventure on Fox Glacier was canceled.

Instead, we drove 25-minutes to Franz Josef Glacier. From the carpark, it is an easy 3.5 mile round-trip, primordial scenic trek to view the massive, icy blue glacier.

A close second, sandflies. Mark my words, they are worse than mosquitos! A sand-fly bite creates an insane itch and redness that lasts for days! Sandflies are everywhere and thrive in all types of weather. Beaches, mountains, hills, warm and cold. Don’t bother with natural bug repellent. Go right for 100% Deet products. It’s the only thing that keeps them at bay.

Biggest Surprise: 20 lb. Weight Loss!

Even with good eating and health, thanks to our active trip (trekking 110-miles and going up and down 34,000 ft.), my partner lost twenty pounds and I lost five. Yes, just five. Somethings in life are just not fair.

Cool Spots: Tasman Glacier, Lake Pukaki, Tasman Sea, Blue Pools & Franz Josef Glacier

Tasman Glacier

Lake Pukaki

Tasman Sea

Blue Pools

Franz Josef Glacier

Over-Rated: Te Anau Glow Warm Caves

If you are in Te Anau, have nothing else to do and $80 to burn, take the ferry ride to this dark, damp, claustrophobic cave to see a bunch of pin-hole, Christmas lights-looking larvae.

Wish We Would Have: Gone Bungee Jumping

We stopped by the famous Kawarau Bridge our first day, on the way to Mt. Cook National Park, to see the bungee jumpers. Psyched to try it ourselves, we decided it was best to wait until our last day in NZ to do a jump. We didn’t want to risk getting injured and ruin the entire trip.

Turns out, we didn’t have time on our last day. C’est la vie!

By the Numbers: What We Hiked in NZ

NZ: South Island Hikes National Park Distance (m)  Elevation Gains/Loses (feet)  Highest Point Our Time Advised Time
Mueller Hut Route Mt. Cook 6.5  6,824  5,900 (Mueller Hut) 6 hrs 6-8 hrs.
Ball Hut Route Mt. Cook 12  820  3,379 (Ball Hut) 6 hrs. 6-8 hrs.
Tasman Glacier View Walk Mt. Cook 1.5  656 30 min. 40 min.
Kea Point Walk Mt. Cook 3.7  1,181 1 hr. 1-2 hrs.
Hooker Valley Track Mt. Cook 6.2  525 2.5 hrs. 3-4 hrs.
Avalanche Peak Arthur’s Pass 4  7,200  6,014 (summit) 5:45 hrs. 6-8 hrs.
Kepler Track Fijordland 37  9,126  4,600 (Luxmore Saddle) 2 days 3-4 days
Milford Track Fijordland 34  7,218  3,786 (MacKinnon Pass) 4 days 4 days
Franz Josepf Glacier Westland Tai Poutini 3.5  200 1.5 hrs. 1.5-2 hrs.
Lake Matherson Westland Tai Poutini 1.6  20 45 min. 1.5 hrs.
TOTALS 110  33,770

A 2-Day Solo Adventure – Climbing Utah’s Highest Mountain, Kings Peak (13,528 ft.)

0

If you are ever in Salt Lake City, Utah, short on time, but want an epic outdoor adventure, go climb the state’s highest mountain, King’s Peak 13,528 ft. (4,123 m), via the Henry Fork Trail. A 3-hour drive from the city, this beautiful and scenic 28-mile round trip trek with 5,436 ft. of ascent, can easily be done in 2-days.

Located in the High Uinta Wilderness Area of the Ashley and Wasatch National Forest, Kings Peak is the seventh highest of the fifty U.S. highpoints (highest point in each state).

I chose the Henry Forks Trail, a popular route, because I was trekking solo in bear and moose country. Wild animals tend to avoid people and noise and if I ran into trouble or hurt myself, the odds were good someone would eventually come along.

Packing Light

My pack weighed under 16lbs. This wasn’t my first rodeo. I’ve backpacked and trekked all over the world and have learned to keep a pack light while maintaining certain comforts. For example, No tent. I would hammock camp just below the tree-line. My 35F rated sleeping bag weighs 1lb. I wear compactable Popticals sunglasses. They protect the eyes, enhance views and make it easier to spot animal footprints, bear and/or deer markings on trees. When it rains, they fold-up easily into a small, durable case, half the size of bulky, regular sunglass cases. Also, since this was just an overnighter, I decided not to cook and left my JetBoil at home. I pre-made several PB&J sandwiches instead. In my old 24L Osprey Rev pack I carried:

*Verizon has the best coverage in the U.S., but even on this trail the only time I had a bar or two was on the summit of Kings Peak.

The Trail

On a sunny, Saturday in July, I arrived at the remote trailhead parking lot around 1pm. I spoke with a few backpackers finishing their trek to get a better idea of current conditions, weather, animals, water sources and pacing. Don’t get me wrong, I did research and read blogs beforehand, but its always good to get up-to-date information. They told me it had hailed the night before, but today looked good. Rain was expected later tomorrow. There were no bear sightings, but a ranger had spotted a couple moose off trail. No worries.

I wore a Garmin to track distance as trip reports differed between 27-30 miles RT. After signing the trail register and putting a note on my rental car’s dashboard with my name, destination, estimated date of return and emergency contact information, I put on my pack, grabbed my Leki trekking poles – with duct tape wrapped around them (ya never know when you’ll need duct tape!)- and started hiking.

Following signs towards Dollar Lake, The Henry Forks Trail is mostly flat for the first 8-9 miles. Starting at an elevation of 9,420 ft., it meanders through a forest filled with Douglas Fir, aspen, spruce and pine trees. Their sweet aroma is pleasant and reminds me of why I love hiking out West. My slightly higher heart rate and breathlessness remind me, I live at sea-level. 

At 3-miles in, I should have run into Alligator Lake. While I did not actually see the lake, at that distance (it is farther left of the trail), there was a rushing stream and a great place to refill water.

I passed almost 150 people, in varying groups, boy scouts, men and a few families, hiking in the opposite direction. Thankfully, they were finishing their 2-3-day adventure. Many wore heavy packs and thick hiking boots. As a female, trekking solo with a much smaller backpack and wearing Hoka trail running shoes (hey, they are light and have great traction!), I was greeted cheerfully by most and skeptically by others. One burly man, hiking out with friends, some carrying fishing poles and another, a shotgun, asked if I was backpacking by myself. When I told him I was, he said, “ma’am you are braver than me.”

Side Note: When it comes to hiking alone, I am an experienced backpacker, have been trained in wilderness survival and keep aware of my surroundings. People fear what they do not know or understand. Research and experience is key. Statistically, animal attacks are rare. My biggest concern is lightening. While I do not wear a SPOT location device, I make sure people know where I am going and how long I’m expected to be there. 


At 5.5-miles, as indicated in reports, I reach a fork in the trail with a sign pointing towards Dollar Lake (8-miles from trailhead and a popular camping spot with fire restrictions). It is the first trail marker/sign I’ve found and like the others to follow, mileage is never indicated. There, I amble over a narrow, wooden bridge at Elkhorn Crossing and follow another sign, pointing me in the right direction.

The trail opens into a scenic, grassy plateau with pockets of trees, framed by mountains. I can see Kings Peak for the first time. Passing on camping at Dollar Lake and I found a beautiful spot right after the trail sign for Gunsight Pass. I nestled my hammock between a couple aspen and a nearby creek. By 6pm, I was eating a PB&J sandwich, relaxing and enjoying the views. Tomorrow was going to be a long day. 


It didn’t rain and temperatures dipped below 40F that night. I slept great and was up and on the trail by 5:45am. To reduce pack weight, I left my hammock, tarp, sleeping bag and mat at the camp site. I’d retrieve them later.

I made it up and over rocky 11,900 ft. Gunsight Pass, about 9.5-miles from the trailhead, in less than an hour. Following cairn, the trail dips into a valley, winds around a talus slope and starts to ascend again between Kings Peak’s east face, and the south face of the Highline ridge. Passing large patches of snow and run-off streams of water, I reach the last mile to the summit. 

It is a steep climb and scramble over boulders and rocks. There is no real path marked, so I just kept going up. This last push took me well over an hour. I reached the summit at 10 am. I had it all to myself and the views were spectacular! 

Still having 14-miles to hike that day, I only spent a half-hour at the top. Dark clouds were accumulating in the distance. I took a more direct, steeper route down. Some of the boulders were unstable and it made me question by decision, but it saved a mile. I made it back to camp, hurriedly packed my things and kept going.

I got rained on and thunder echoed behind me, but thankfully, no lightening. When I reached the trailhead, the skies were clear and it was 5pm. My Garmin logged 27-miles and my legs felt every single one. The scenery, trail and summit were worth it!

This Article was written by Payge McMahon and originally published on Popticals in August 2017


NZ: Backpacking the Milford Track

0

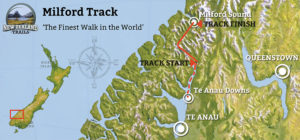
The Milford Track is one of New Zealand’s nine Great Walks and is located in Fiordland National Park on New Zealand’s South Island. It is a very popular one-way, 33-mile/ 53.5km, 3,000 m/ 10,000 ft. cumulative ascent and decent, 4-day, hut-to-hut trek from Lake Te Anau to Milford Sound.

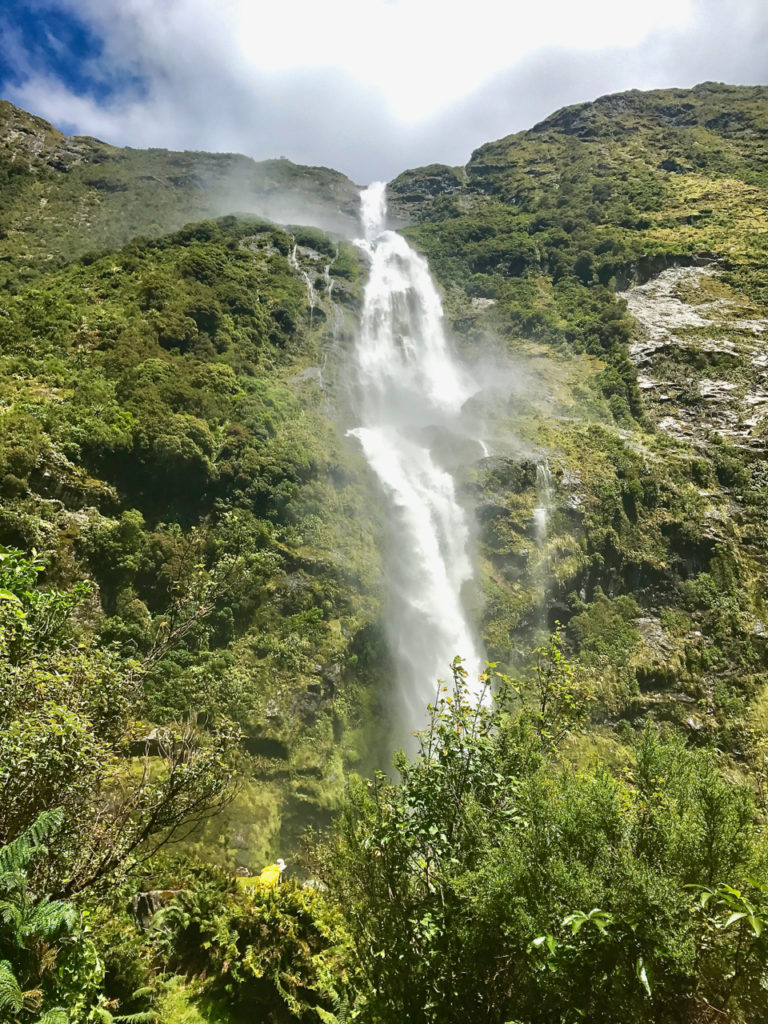
The Milford Track takes you through beech forest, valleys, alpine tussocks, across crystal clear rivers and up and over the impressive Mackinnon Pass 1154m (3786 ft.). Don’t miss taking the side trek, to see up close, Sutherland Waterfall 580m (1906 ft.), one of the world’s highest waterfalls.

The biggest challenge to hiking the Milford Track, besides the ever-present sandflies, is booking hut and ferry reservations and managing transportation logistics. Hut and ferry reservations must be made ahead of time. Camping is not allowed and because of trail restrictions, permits and transportation, in peak season, you have to do the trek in 4-days Since the trek starts and finishes in different locations, you also need to deal with your car or figure out the bus schedule.

Here is how we did it and what you need to know!
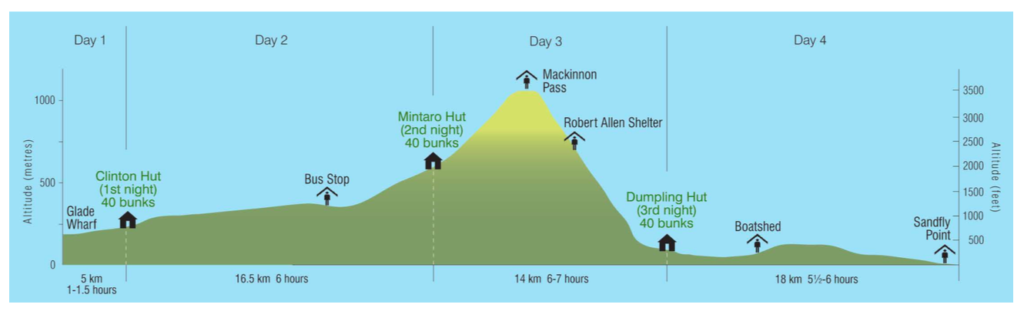
Reservations

New Zealand’s Department of Conservation maintains 4 huts on the Milford Track. Each hut has a kitchen/dining area with sinks, gas burners (cooking pots and food are not provided), a wood stove and bathrooms, no showers.  Each bunk has a simple mattress.

The rate is NZ $70 per adult, per hut. Children, 17 and under, stay for free.

Hut Reservations must be booked ahead of time and can be done online or at a DOC visitor center. Once confirmed, pick tickets up at a DOC visitors center and take them on the hike. The Hut masters/rangers will ask for them.

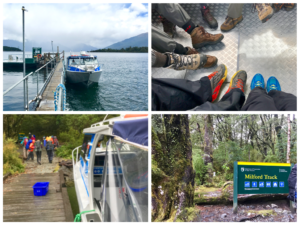
Ferry/Boat Transfers must be booked ahead of time. Fiordland Watertaxi  offers transportation from Te Anau Downs to Glade Wharf (trailhead start). The DOC manages ferry/boat bookings from Sandfly Point (trail finish), at the end of the track, to Milford Sound. Expect to pay between NZ $180 and NZ $210 for round trip transportation.

NOTE: The Milford Track is the most popular of NZ’s Great Walks and sells-out months in advance. I tried booking reservations in January, a month before we left for New Zealand and they were full. After kicking myself, for waiting so long, I researched options.  If we wanted to do this trek, we could:

A – Reach out to EasyHike, an adventure travel logistics company that works with the DOC and Great Hikes to see if they had any reservation cancellations.

B – Go with a guided tour that has their own huts on the trail. I didn’t want or need a guide. They are also way more expensive, but the huts are nicer and they feed you.

C – Show up at DOC visitors’ center and pray they had a last-minute cancellation,

We went with Option A – EasyHike. Coincidentally, they had a cancellation and were able to transfer the reservations to us. They also transported our rental car from Te Anau Downs to Milford Sound. No bus required!

EasyHike is a one-stop-shop, hassle-free company that offers several hiking packages for traveler who don’t want to stress over logistics, have proper clothes/gear or time to shop for food supplies. They can provide all these things! We decided to try their package that provides food and they hooked us up! We ate like kings on the Milford Track. EasyHike saved us time, money and really made our trip easy. All we had to do was pick up our permits, meet the ferry and hike. 
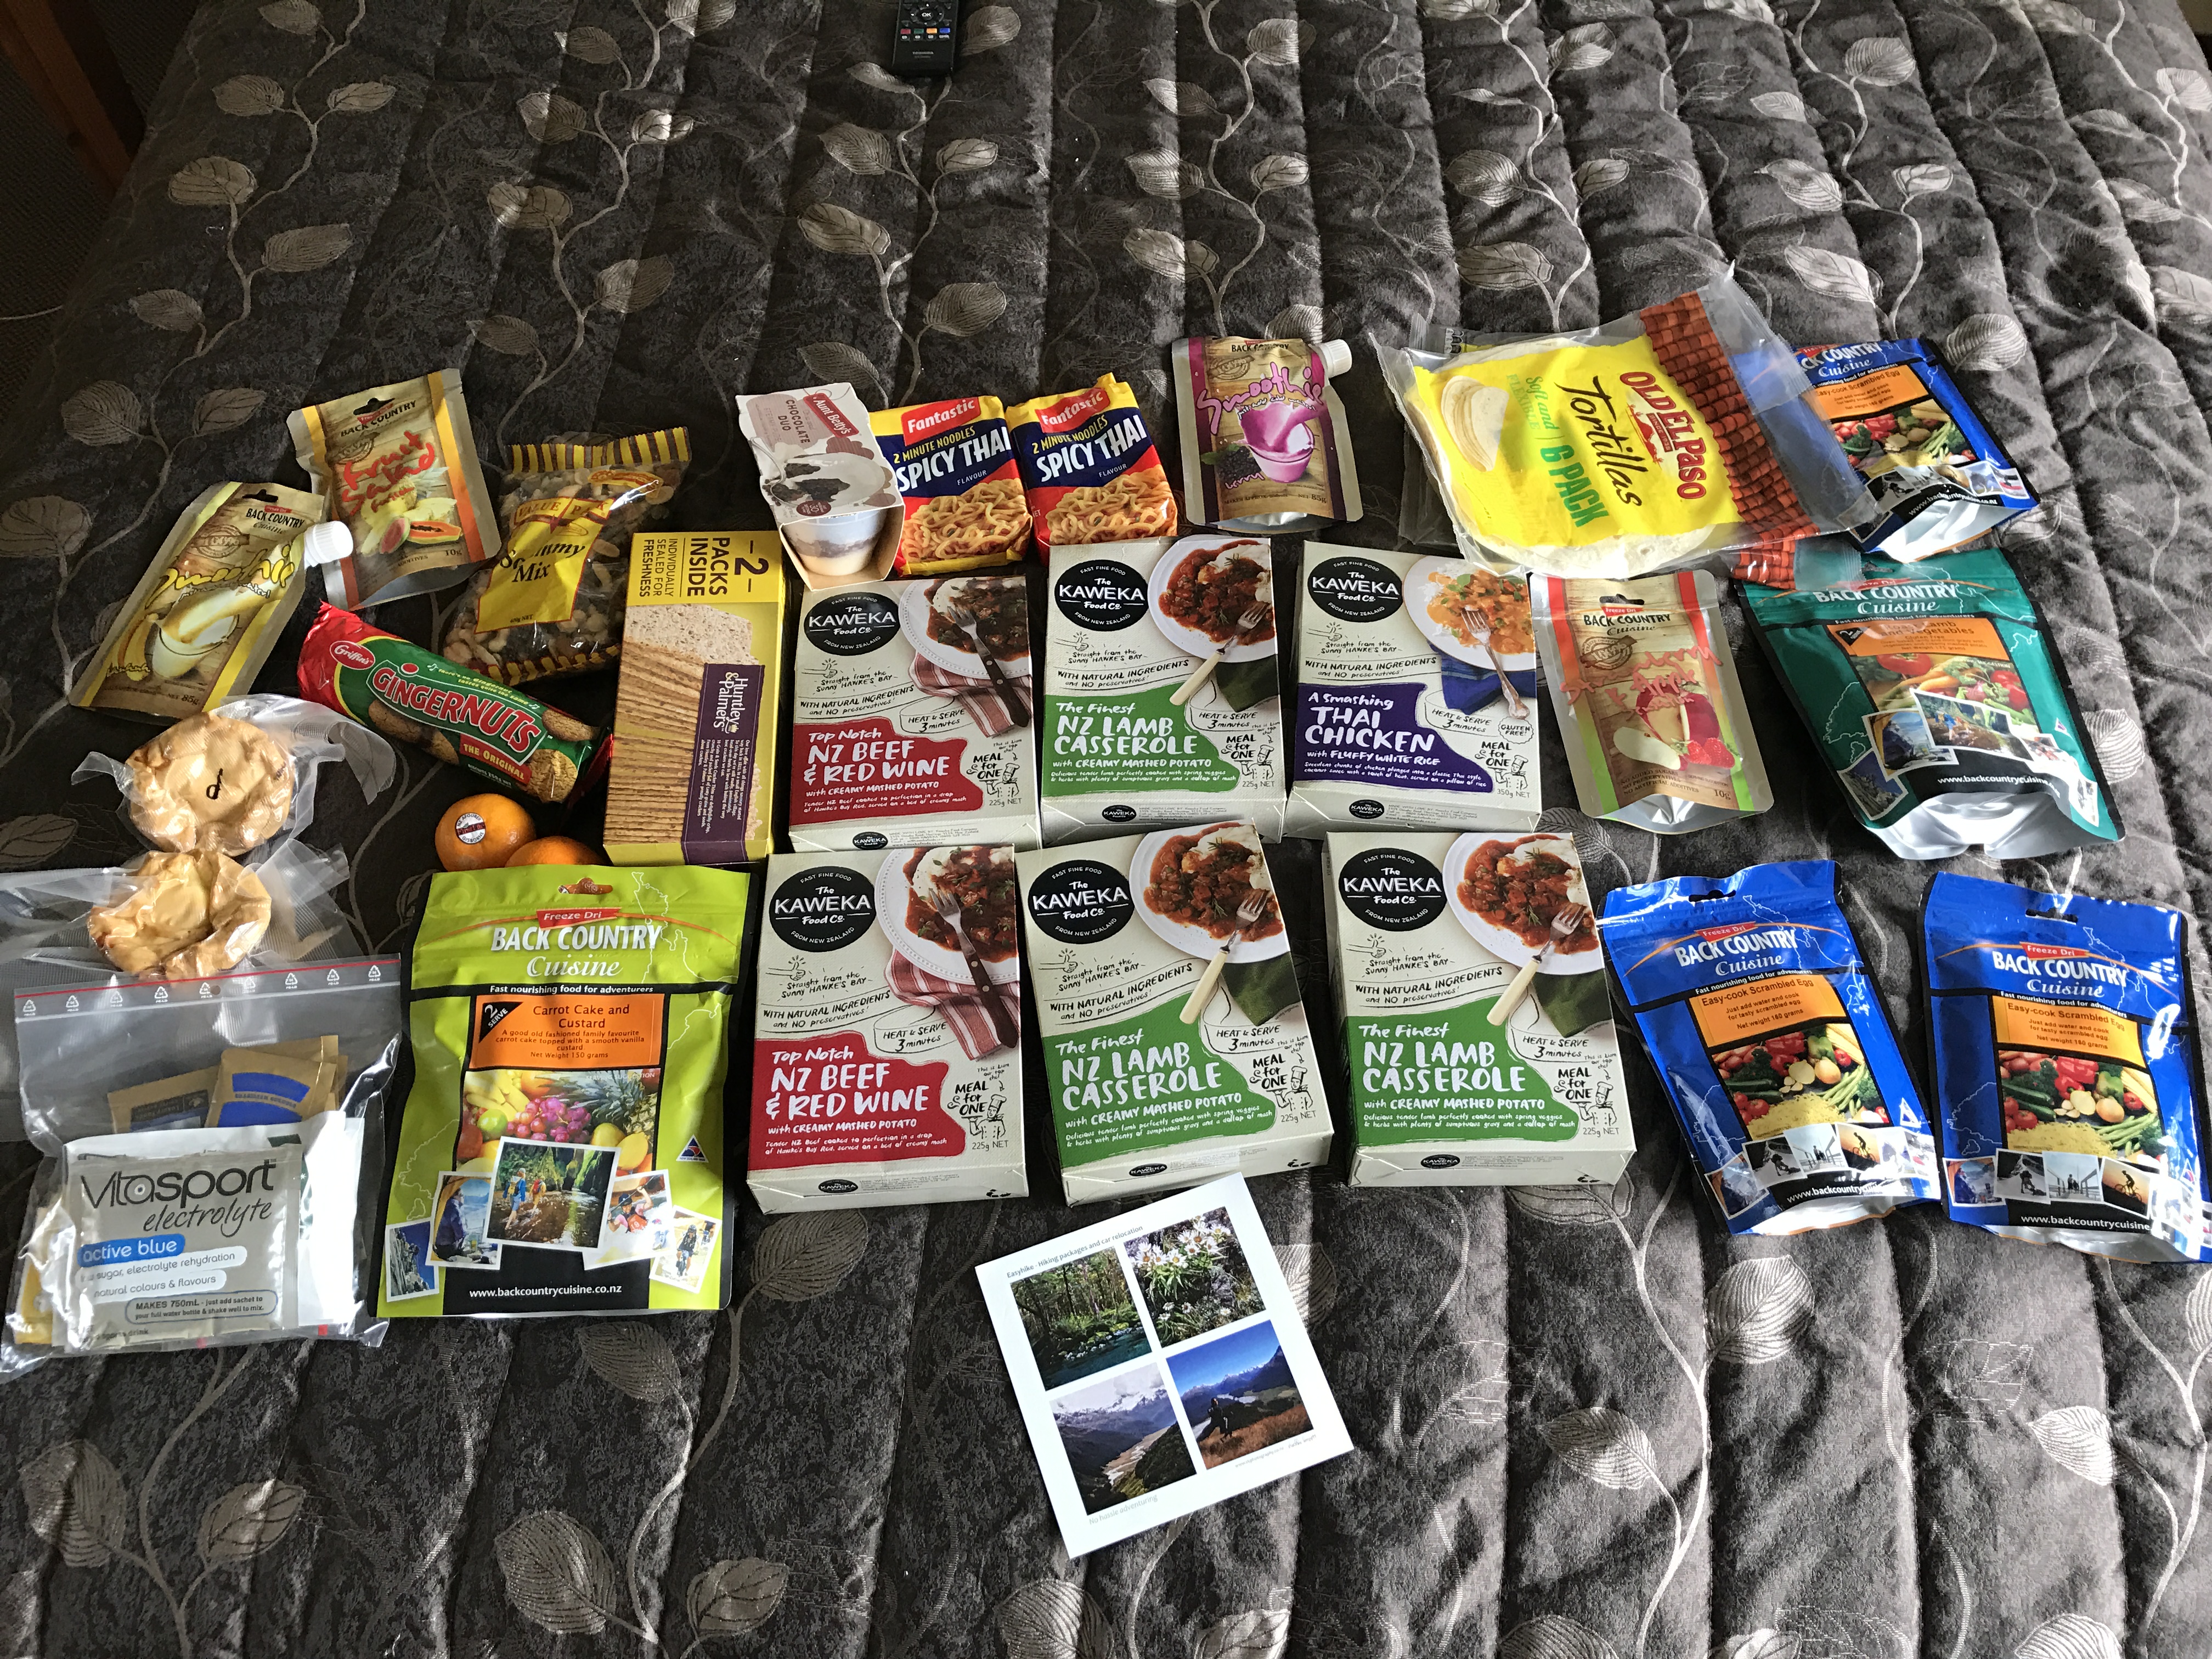

Logistics

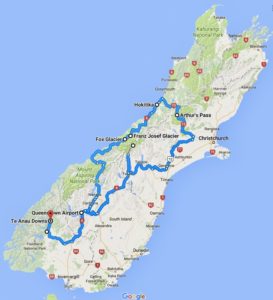
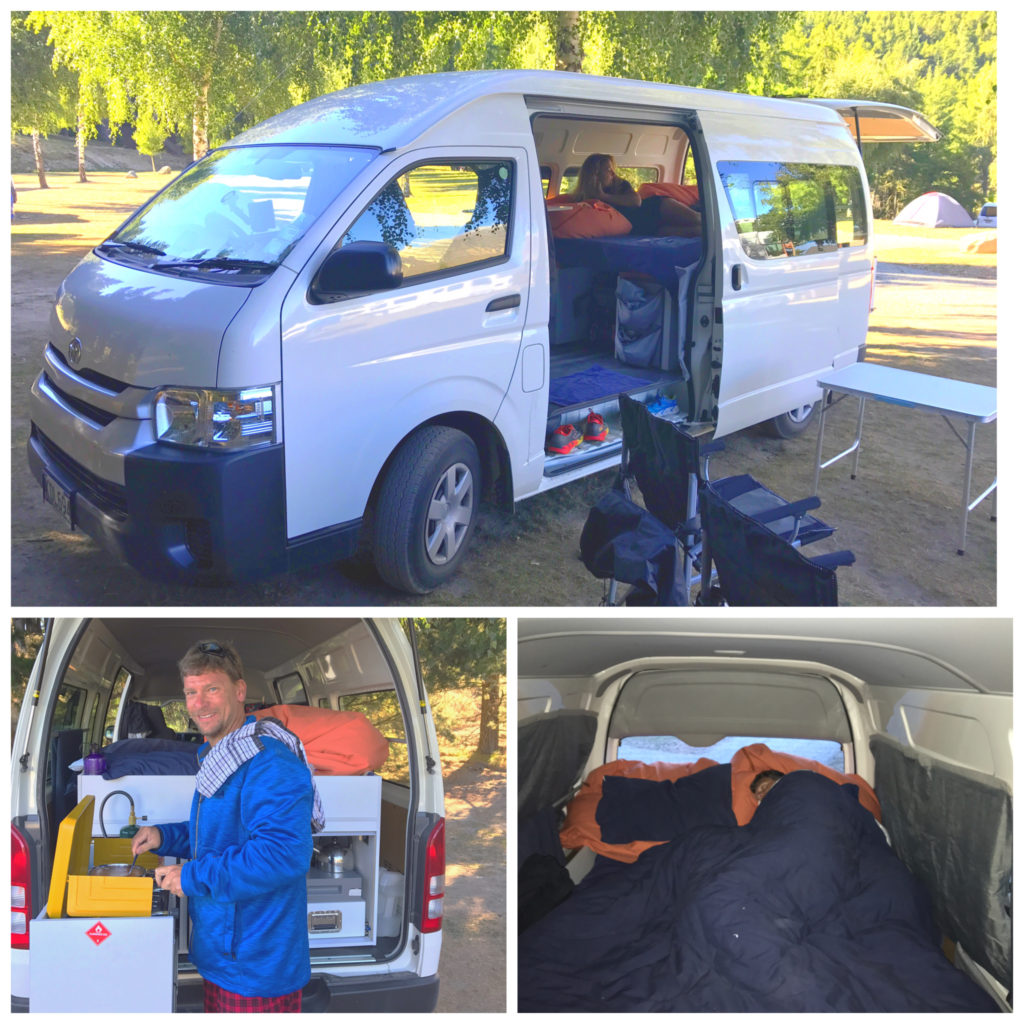
We rented a car from Avis at Queenstown airport and drove to Te Anau, NZ. It is a pleasant two-hour drive through rolling hills, farms and fields.

Te Anau is a great little ‘base camp’ town for Fiordland National Park. If you need to buy anything for your trek, they have an outdoor retailer and a Four-Square grocery store. There are also plenty of restaurants and hotels.

We picked up our tickets, the day before our trek at the DOC visitor’s center and spent the night in a hotel. The next day, we drove 20-minutes north, to Te Anau Downs, to meet the ferry at the pier. You will be assigned a specific time to meet the ferry – Do not miss it!

TIPS

  • If going in high-season, I recommend booking months and months in advance. Don’t wait to get to the visitor’s center.
  • If you don’t want to hassle with reservations or logistics, book a package with EasyHike.
  • The ferry ride from Te Anau Downs to the start of the trek is an hour. Make sure you go to the bathroom before getting on the boat. Some boats do NOT have a bathroom.
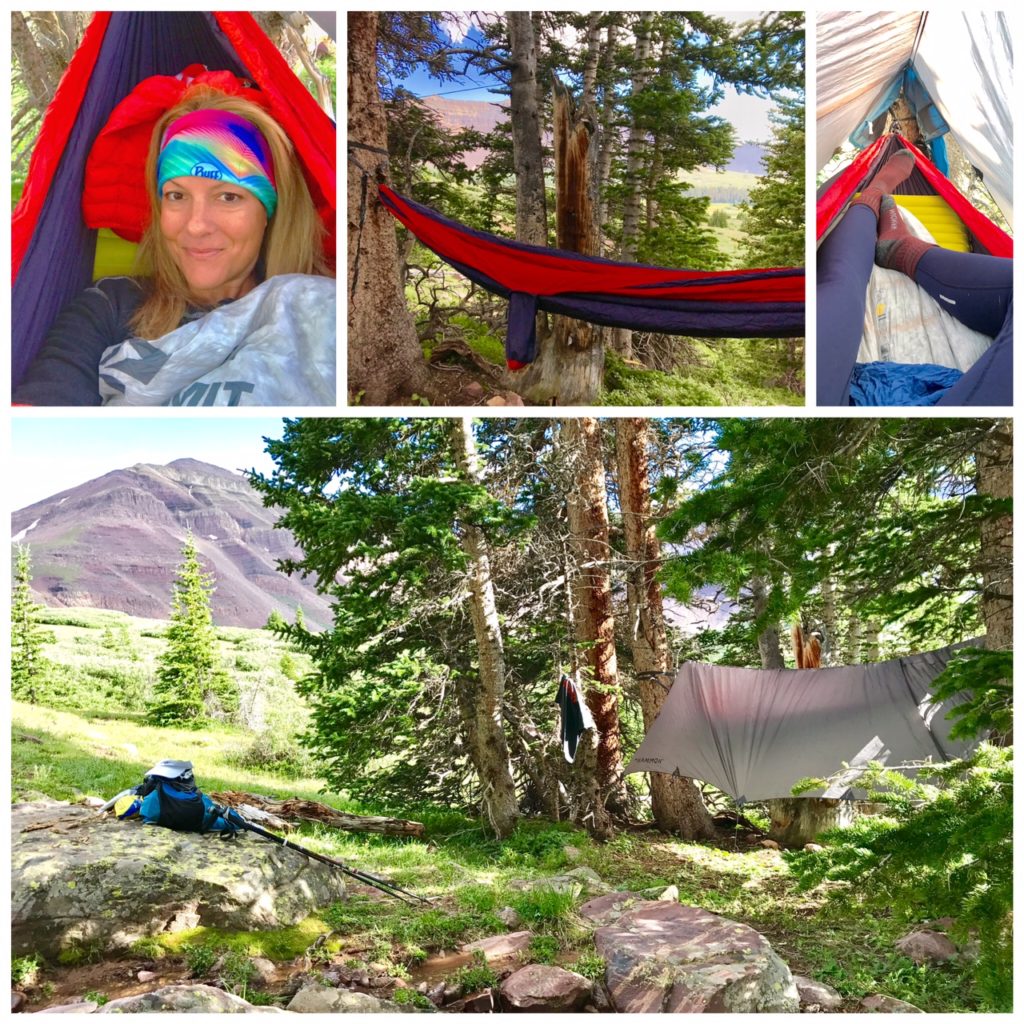
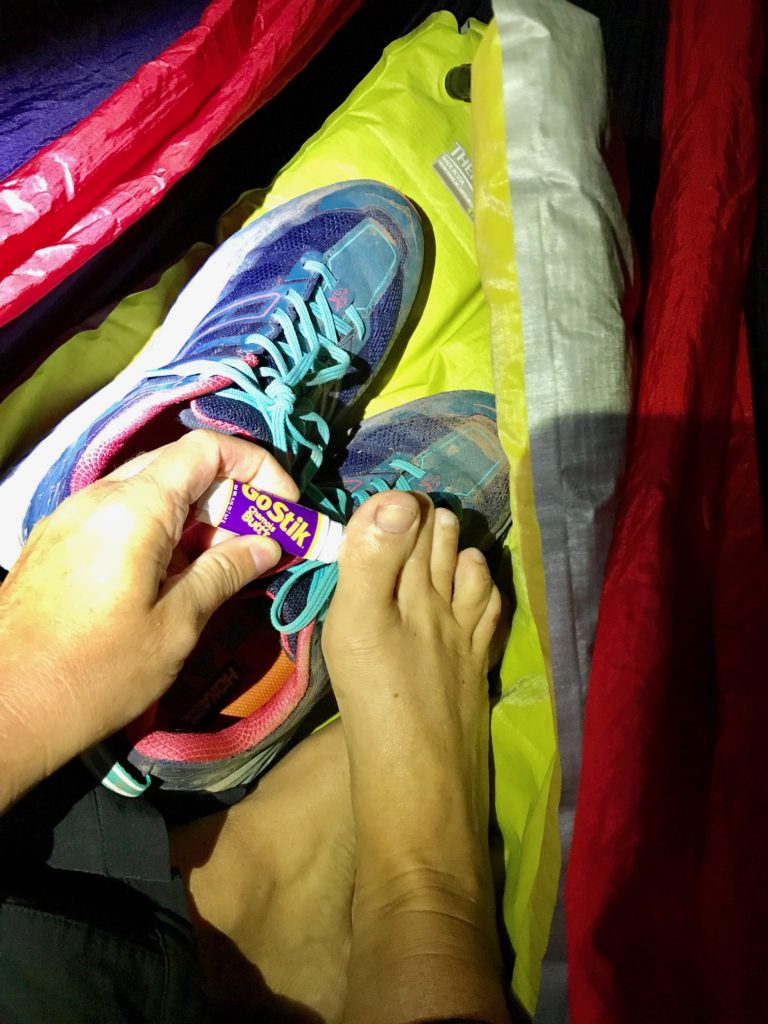
  • You don’t need heavy trekking boot. Wear shoes with good traction. We hiked in Hoka One One trail running sneakers.
  • Be sure to bring a pot if you are going to cook or boil water
  • Back Country Cuisine and The Outdoor Gourmet make really good dehydrated meals and can be bought at the outdoor store in Te Anau.
  • The hut master does collect tickets (don’t lose or forget them!)
  • The sandflies are no joke. Absolutely bring bug spray, with DEET. Don’t even bother with natural repellent. The sand-flies will laugh at you.

Hiking

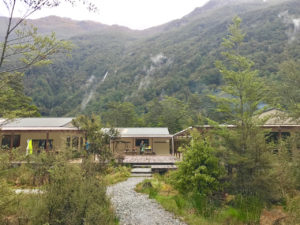
Day 1: Glade Wharf to Clinton Hut (5km / 3.1m)

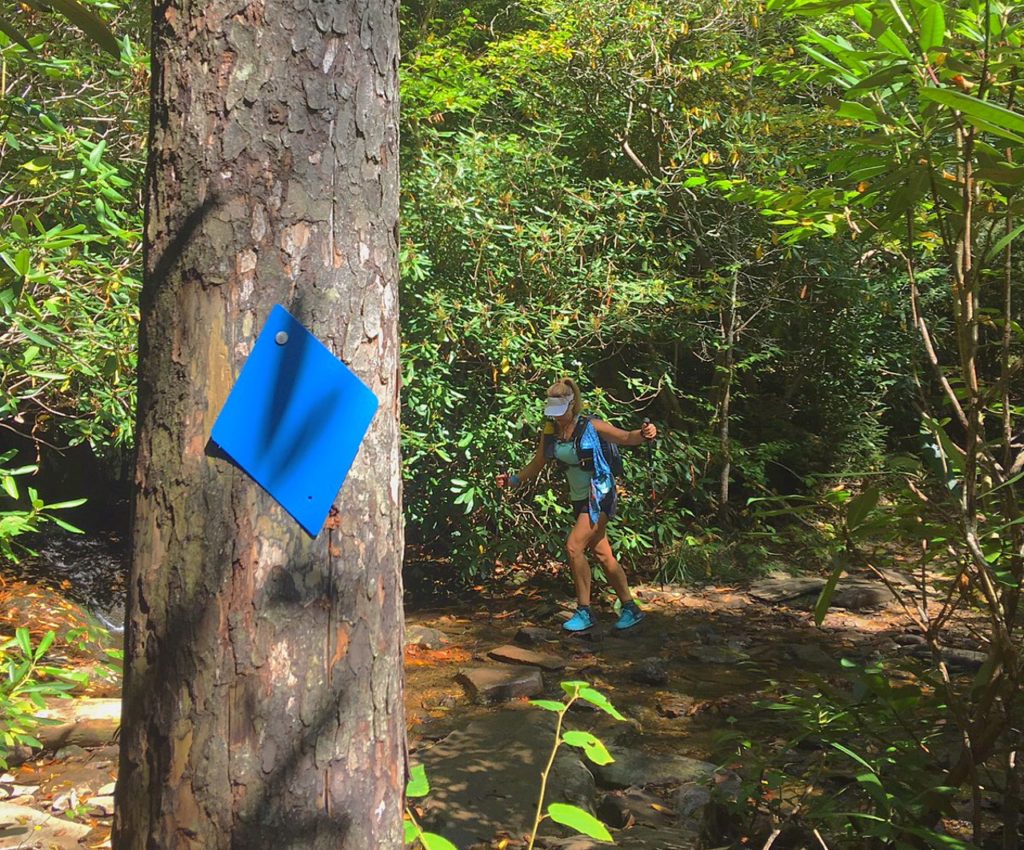
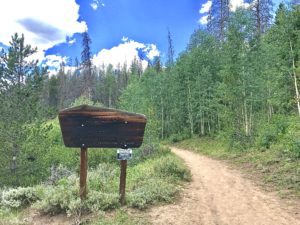
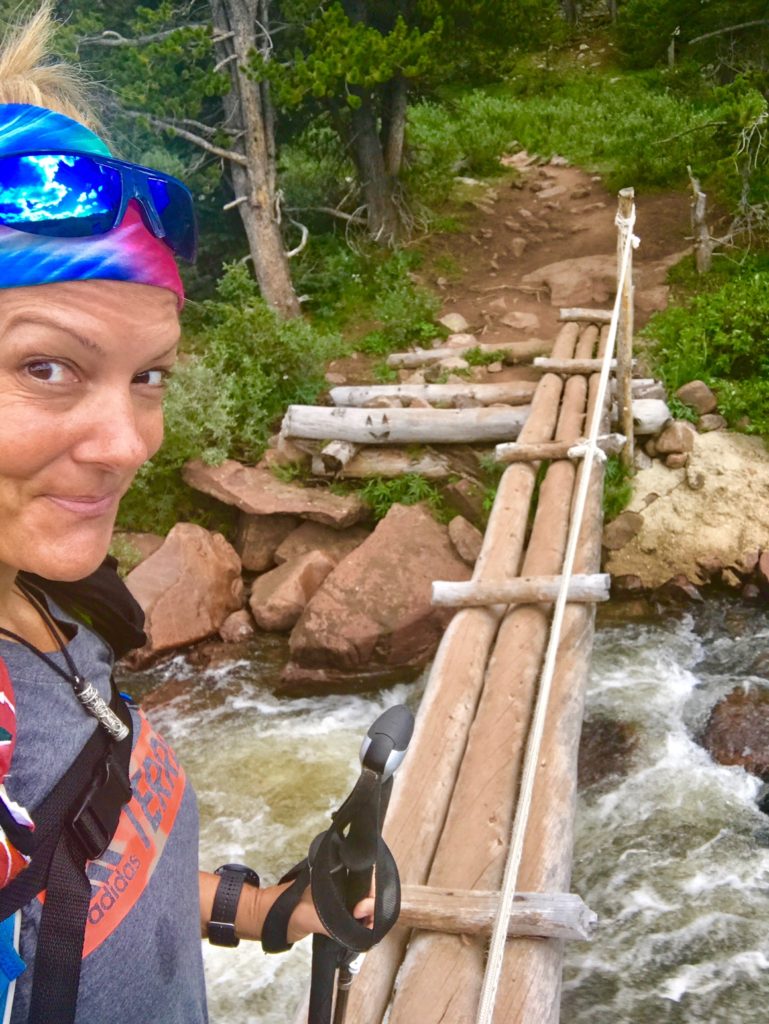
Our ferry left Te Anau Downs at 2:30pm. After a bumpy, hour-long boat ride, we set foot on land at Glade Wharf. A big welcome sign points to the trail. It started raining, of course – because that is what it does in New Zealand – so we put on rain gear and headed down the trail. A lush beech forest led to a clearing, then more trees and the Clinton River. It is an easy hike and took 45-min. to reach Clinton Hut.

Clinton Hut has two separate dorms with bunk beds, a separate kitchen/dining area and bathrooms.

There isn’t much to do once you reach the hut, aside from eat, sleep, socialize, read old magazines and informational literature about the area. You can wonder around outside, but if it isn’t raining, the sandflies will drive you back indoors. Don’t forget bug spray! The hut master/ranger will collect tickets and at 7:30pm, give an informative speech about the area and weather report.

Day 2: Clinton Hut to Mintaro Hut (16.5km / 7m)

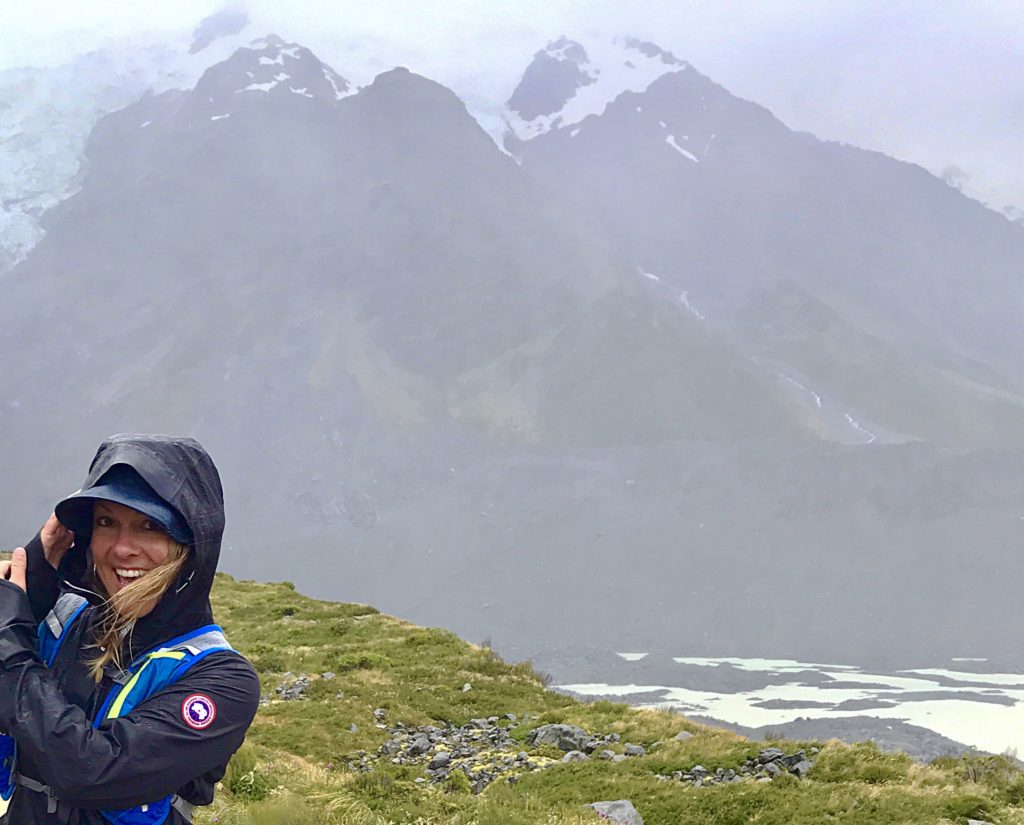
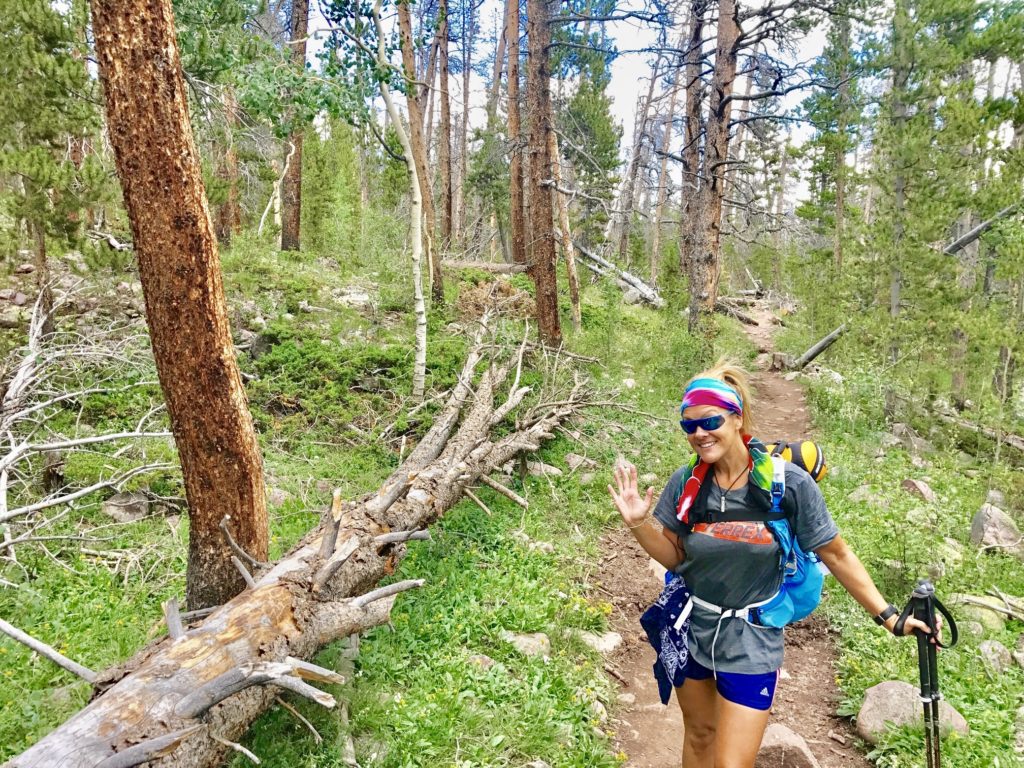
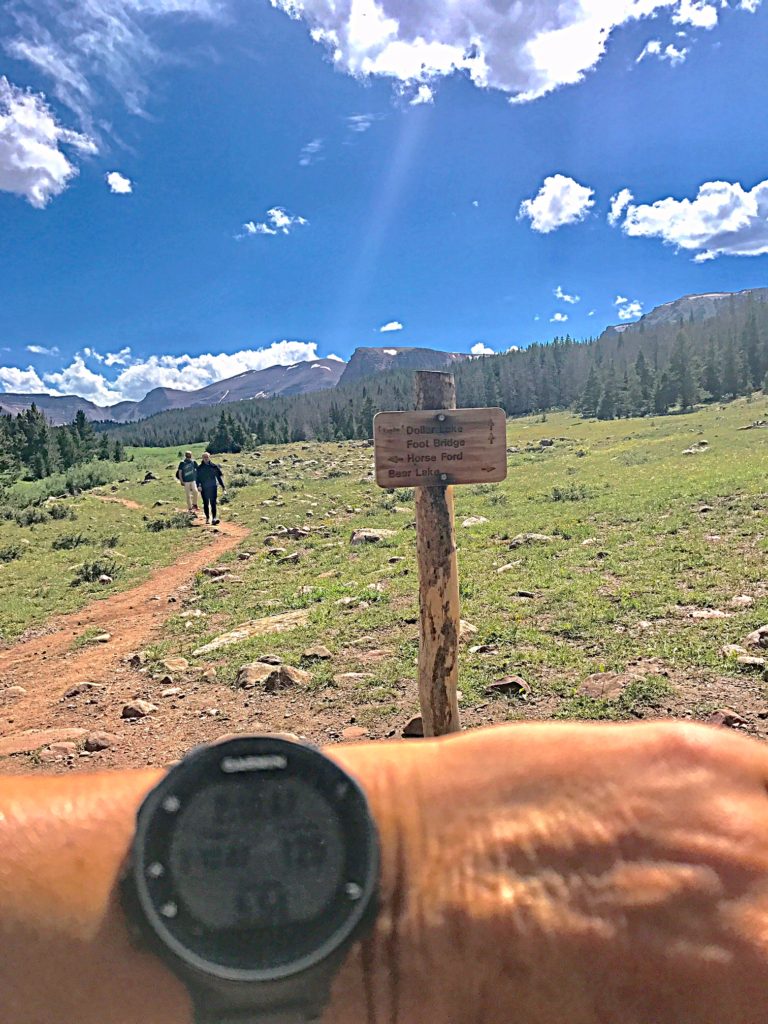
We slept great and were on the trail by 8:30am. It is another easy hike. Elevation gradually increases after trekking through a tussock valley, surrounded by cliffs and scattered waterfalls. In the distance, you’ll see MacKinnon Pass – climbed the following day.

Weather was nice, until the last hour of the trek. Then it started raining again and temperatures dropped. We are faster than average hikers and were glad to arrive at Mintaro Hut in 4.5 hours. We were the first to arrive and with provided wood, started a fire in the stove to warm the kitchen/dining area.

Guidebooks recommend it takes 6 hours to reach Mintaro Hut and this was true for many of the hikers.

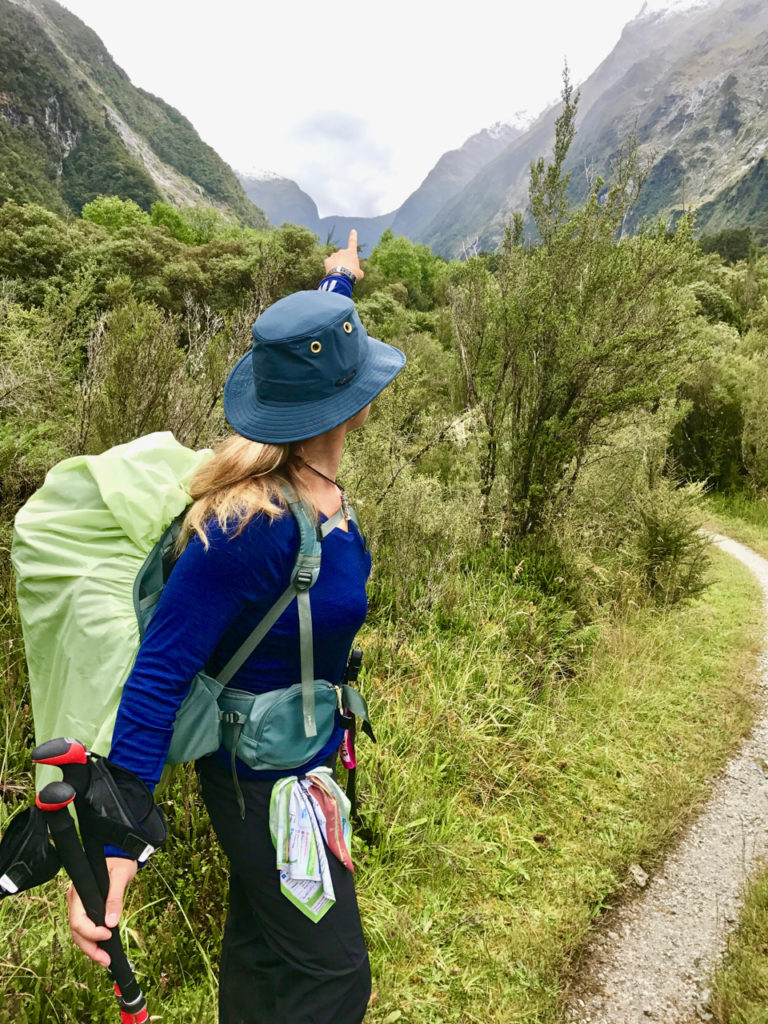
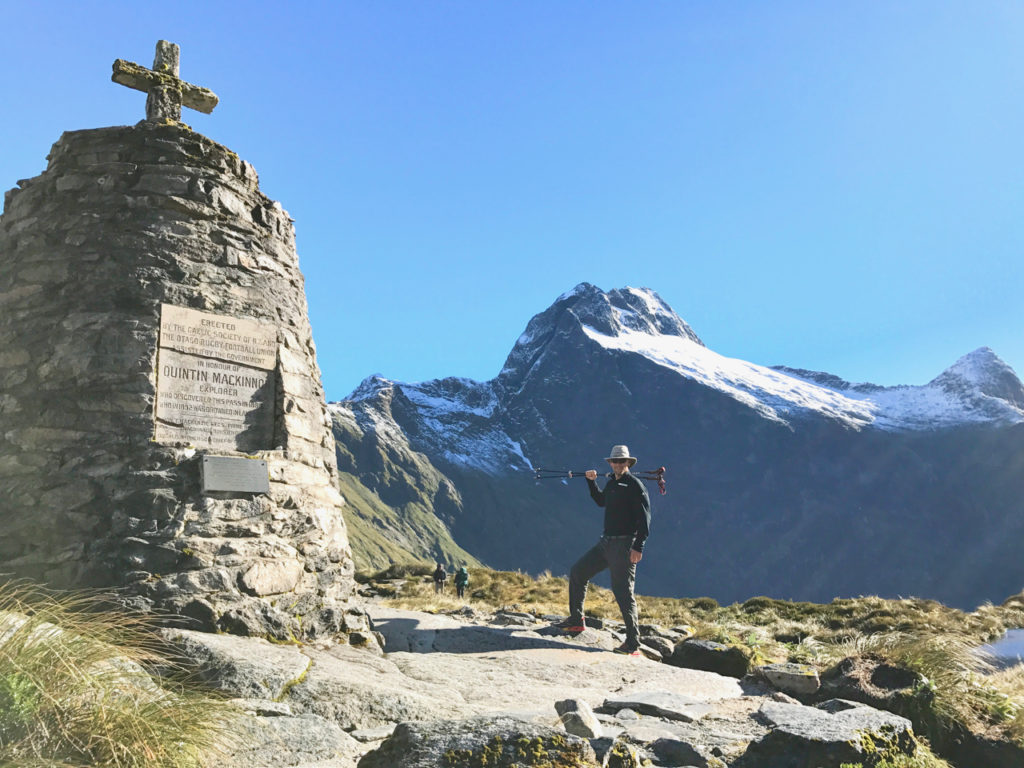
Pointing to MacKinnon Pass
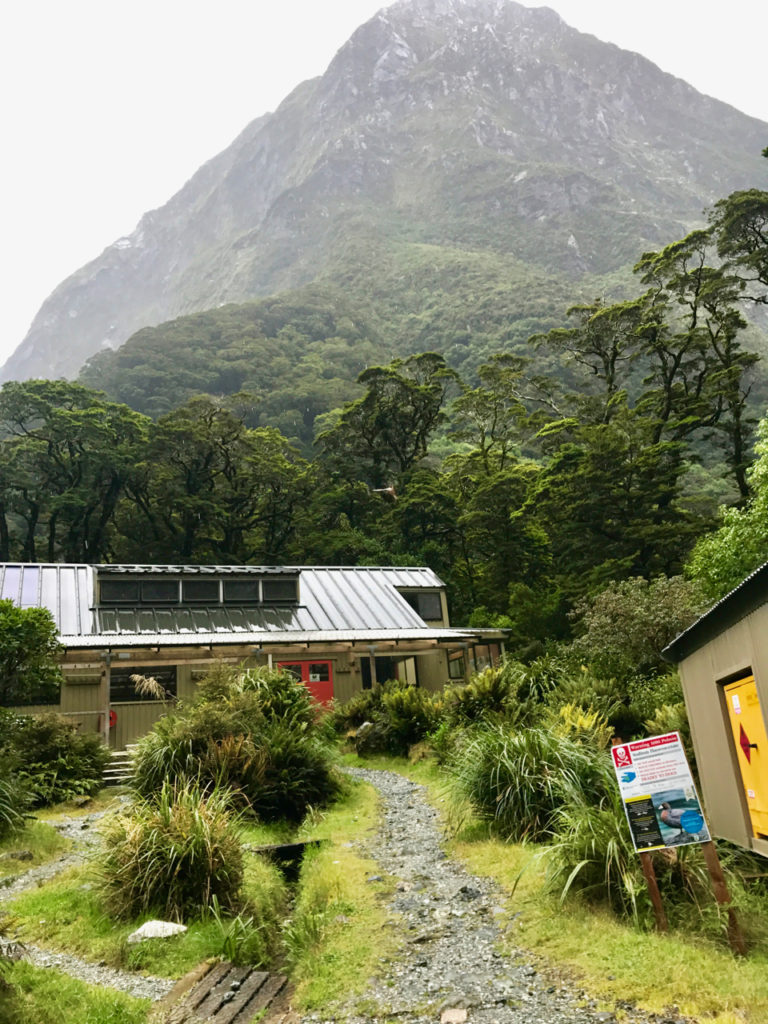
Mintaro Hut

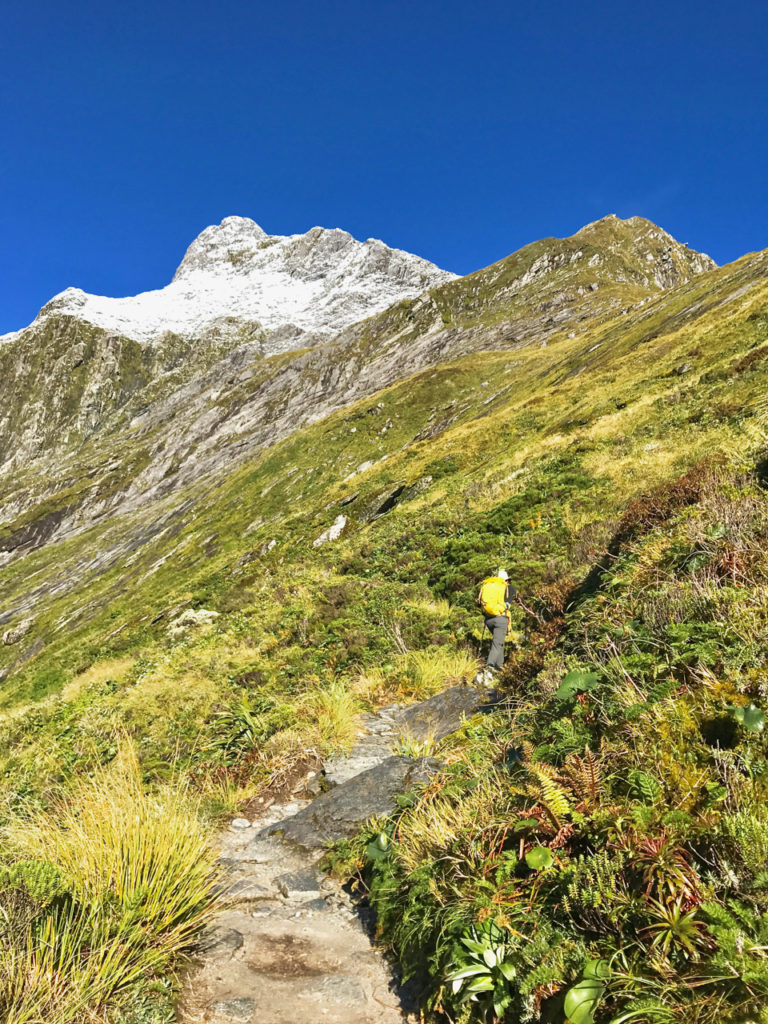
Day 3 – Mintaro Hut over Mackinnon Pass (1,154m) to Dumpling Hut (14km)

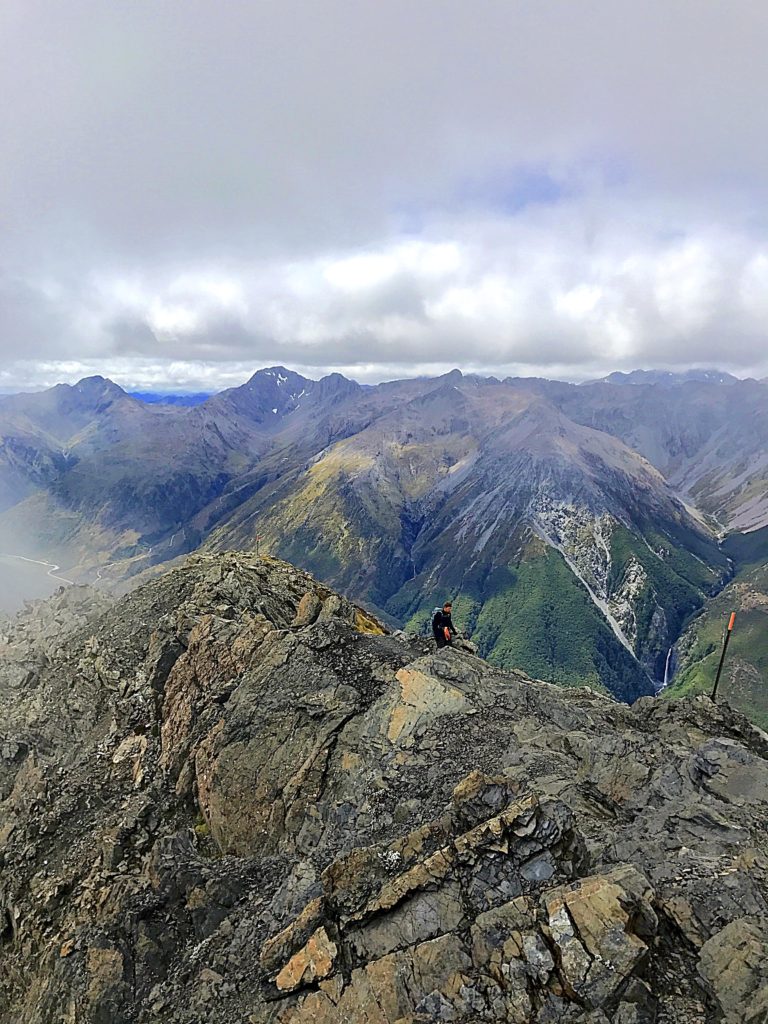
The hardest day on the track, because of the ascent and descent, is also the most scenic. We lucked out and hiked MacKinnon Pass on a beautiful, sunny day.

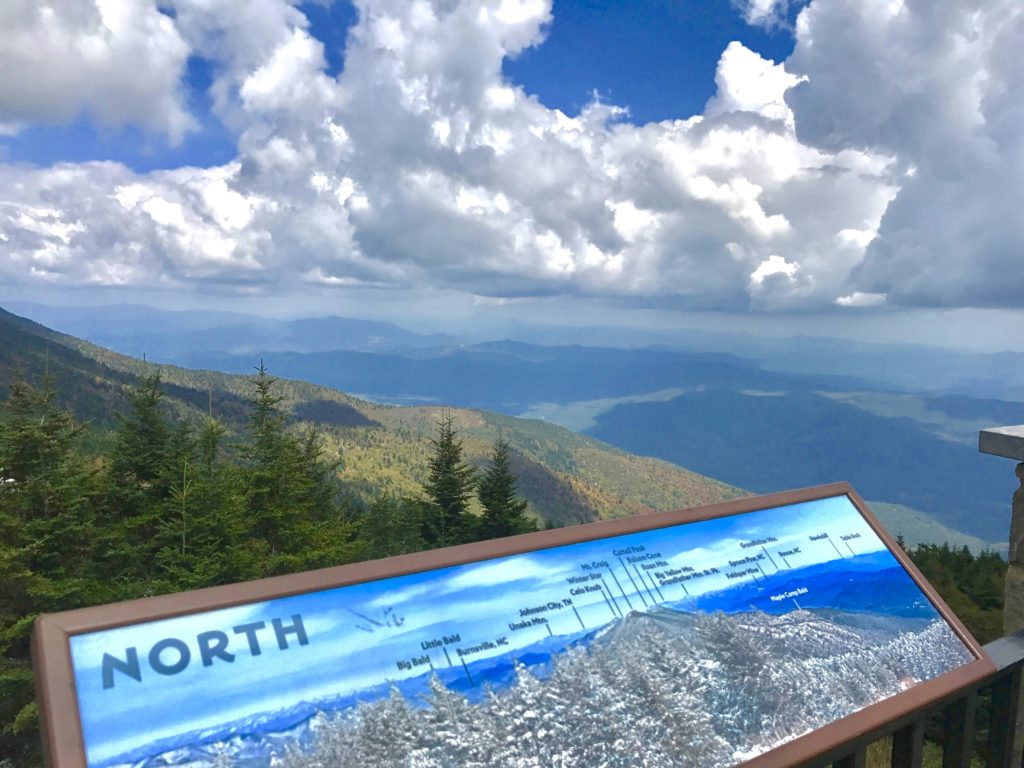
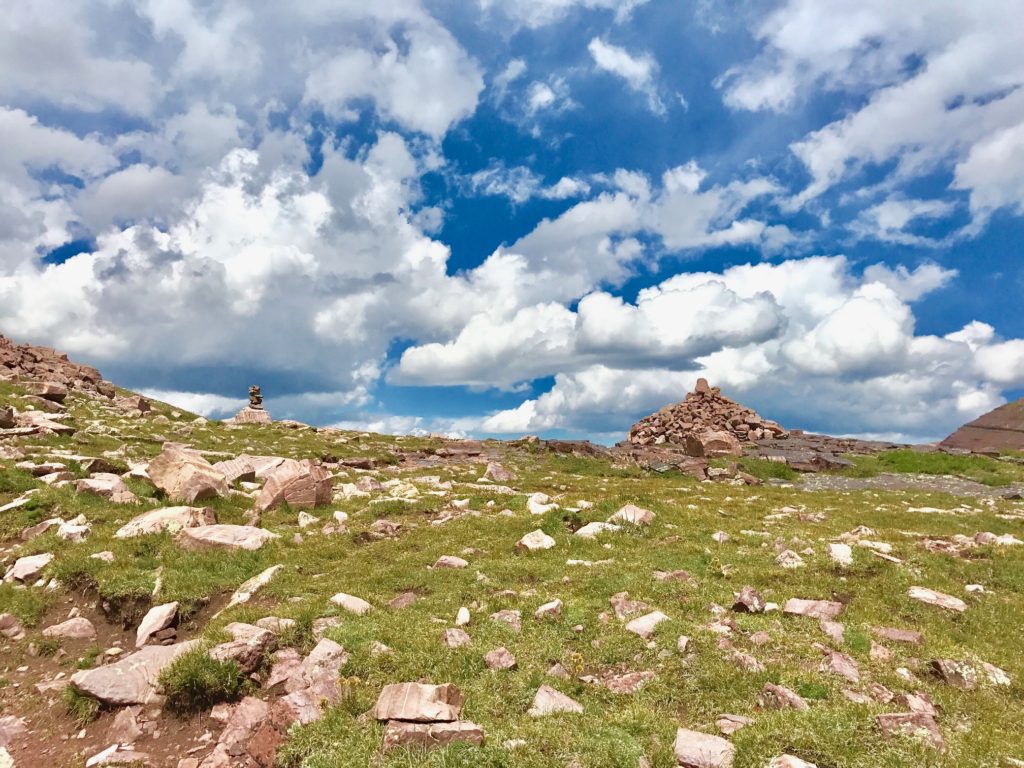
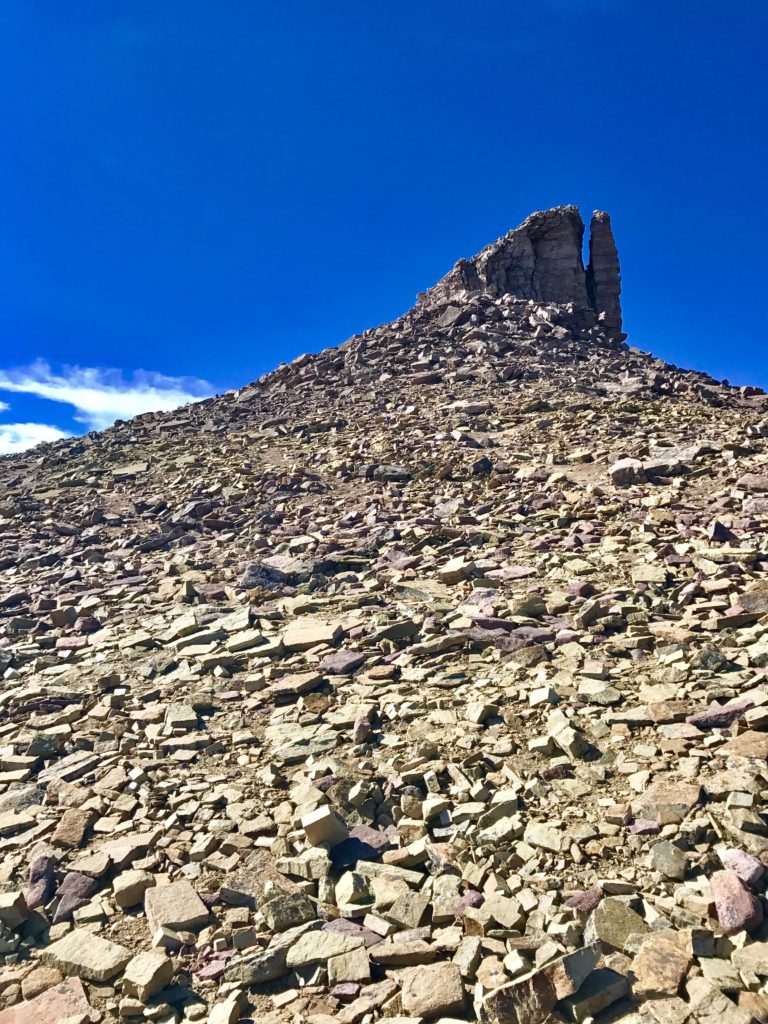
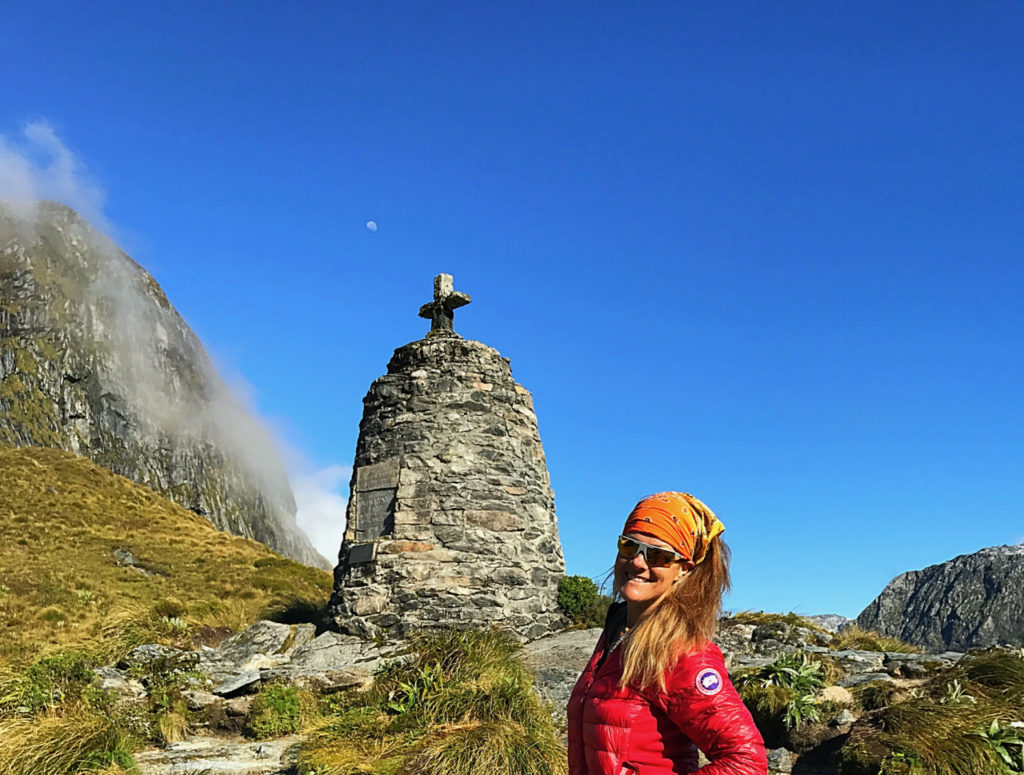
Expect lots of switchbacks going up the pass and down. We spent an hour at the top enjoying panoramic views of distant now-capped mountains, Clinton Valley and taking pictures of the monument. After passing the highest point on the trek, MacKinnon Shelter, we started the long descent.

About an hour from Dumpling Hut, there is a turn-off to trek to the famous Sutherland Waterfall. Do it! It’s a bit of climb, but worth it. It took a little more than an hour, round-trip.

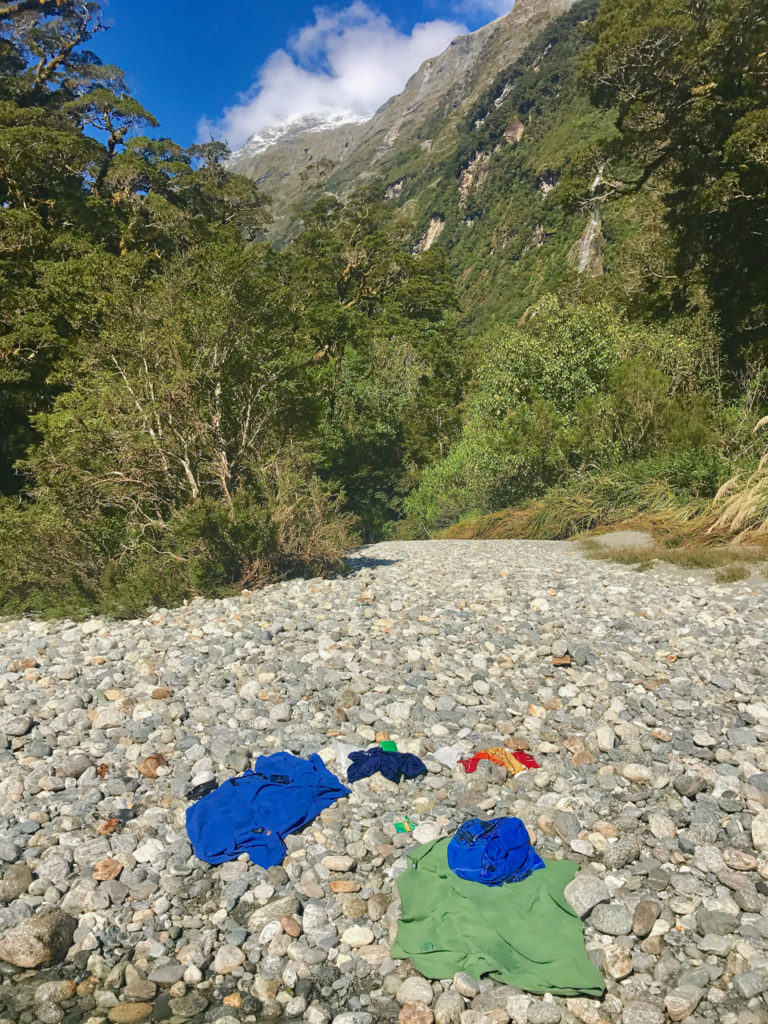
We reached Dumpling Hut 6-hours after leaving Mintaro Hut. This includes our side trip to Sutherland Falls. Again, we were the first to arrive.  The ranger recommended a 2-minute hike to reach a rocky beach area on the river. It was hot and we were all for it. We cooled off in the river and attempted to relax on the beach.The sandflies were terrible and we retreated back to the hut.

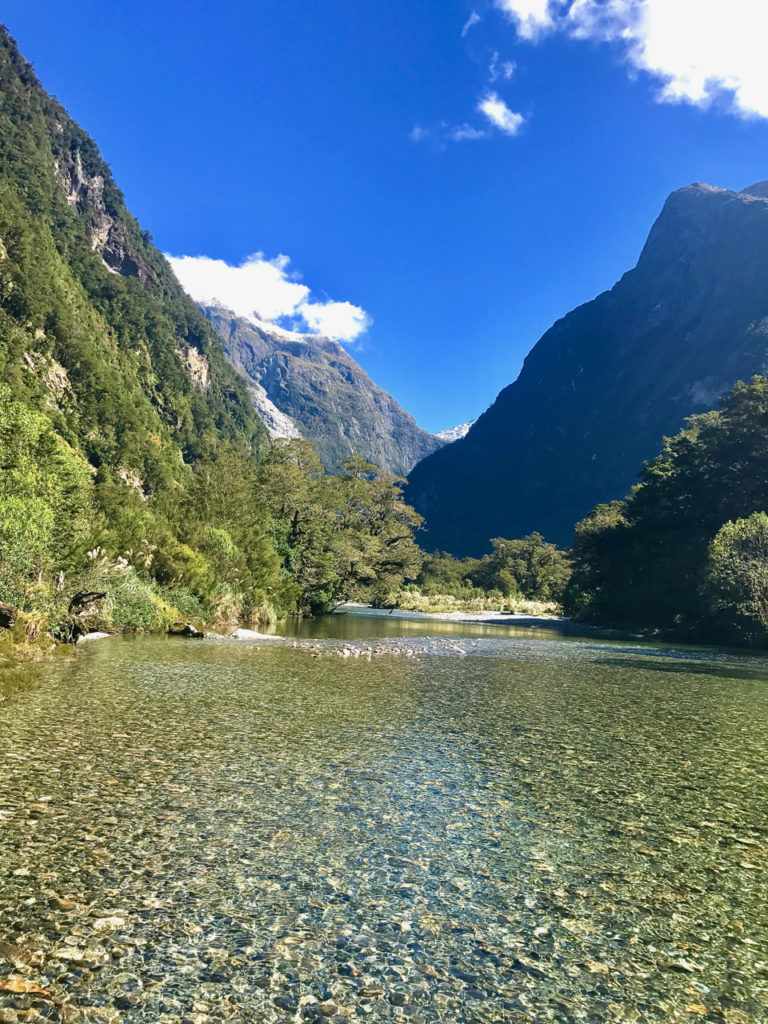
Day 4 – Dumpling Hut to Sandfly Point (18km)

The last day on the track was hot and had more of the same scenery. Beech forests along Arthurs River, more waterfalls and a dirt track to the boat shed on Sandfly Point. It felt longer than 18km.  Maybe we were just anxious to get away from sandflies and get a shower.

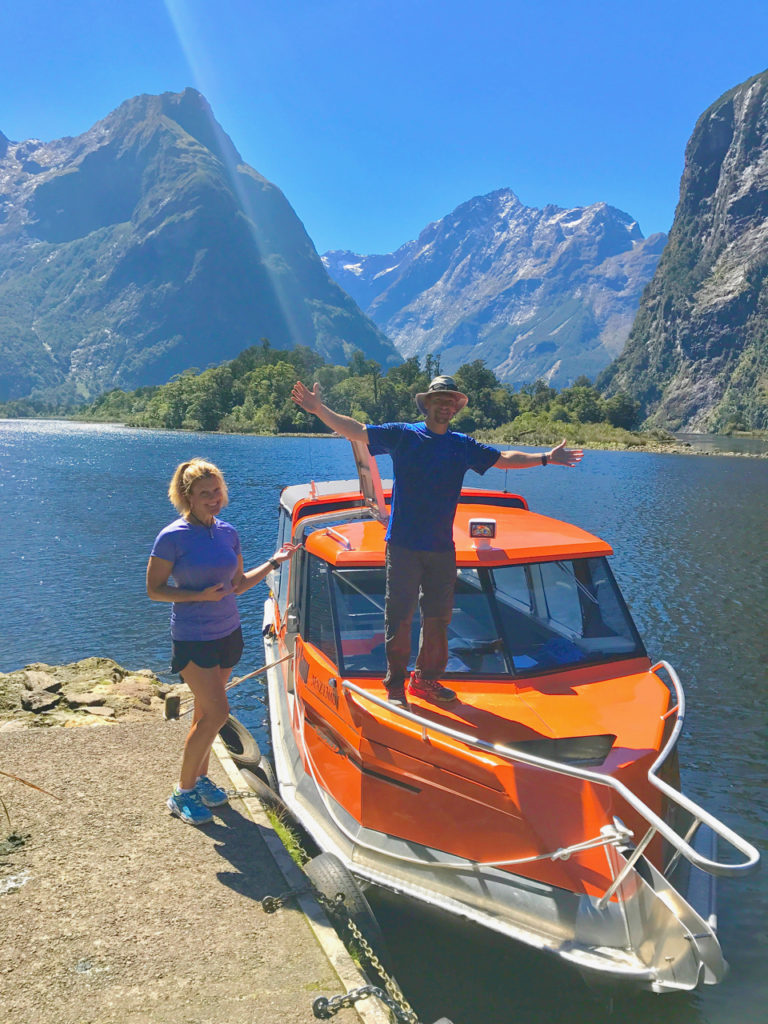
We reached Sandfly Point in 4.5-hours and waited only 30-minutes for the early boat to take us to Milford Sound. A 20-minute boat ride later and we were back in civilization.

The other Milford Track hikers had to wait for a bus to take them to their final destinations. Thanks to EasyHike, we picked up our car keys at a designated counter in the visitor building. Our car was waiting in the parking lot. EasyHike also recommended, and made reservations, for us at the famous Milford Sound Lodge – a short, 5-minute drive. It is remote, a bit pricy, but a nice treat to end the trek.
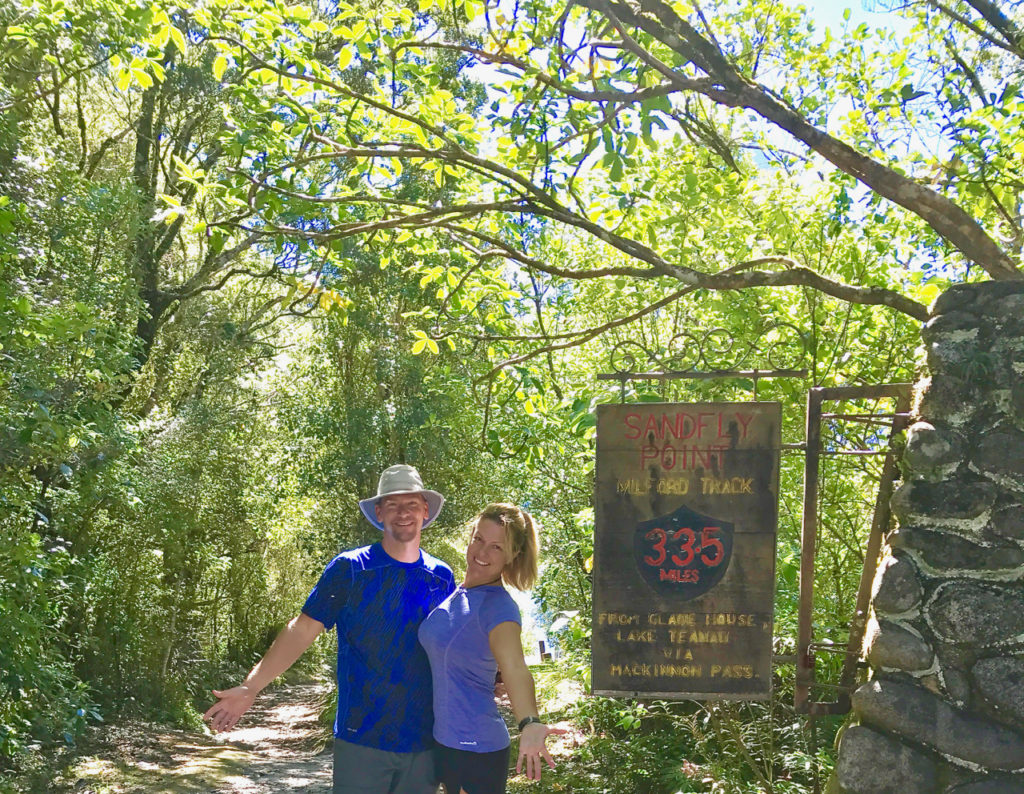
MORE TIPS

  • It rains over 200 days a year in Fiordland National Park.
  • Bring a rain jacket and pants.
  • Bring a rain cover for your backpack
  • Wear a hat with a brim to avert the rain
  • Use Trekking Poles

We spent sixteen days on the South Island and completed 10 different treks, hiking over 110 miles with 34,000 feet of elevation gains and losses.

The Milford Track was our last adventure in NZ. We liked it and recommend it if you can get reservations.

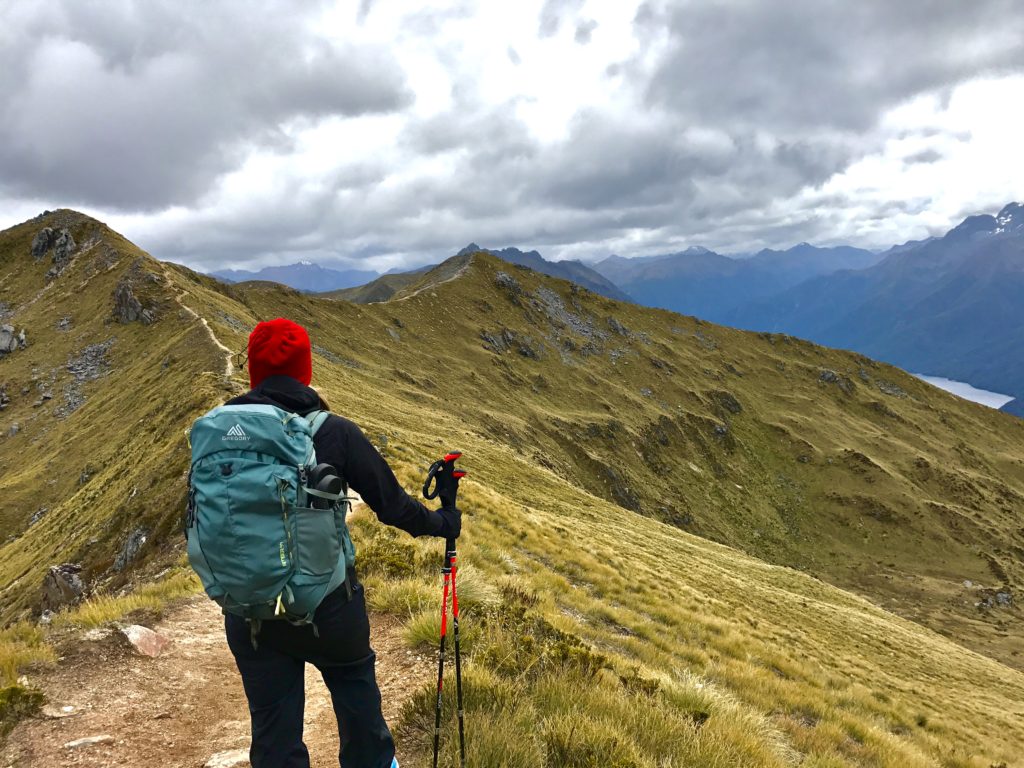
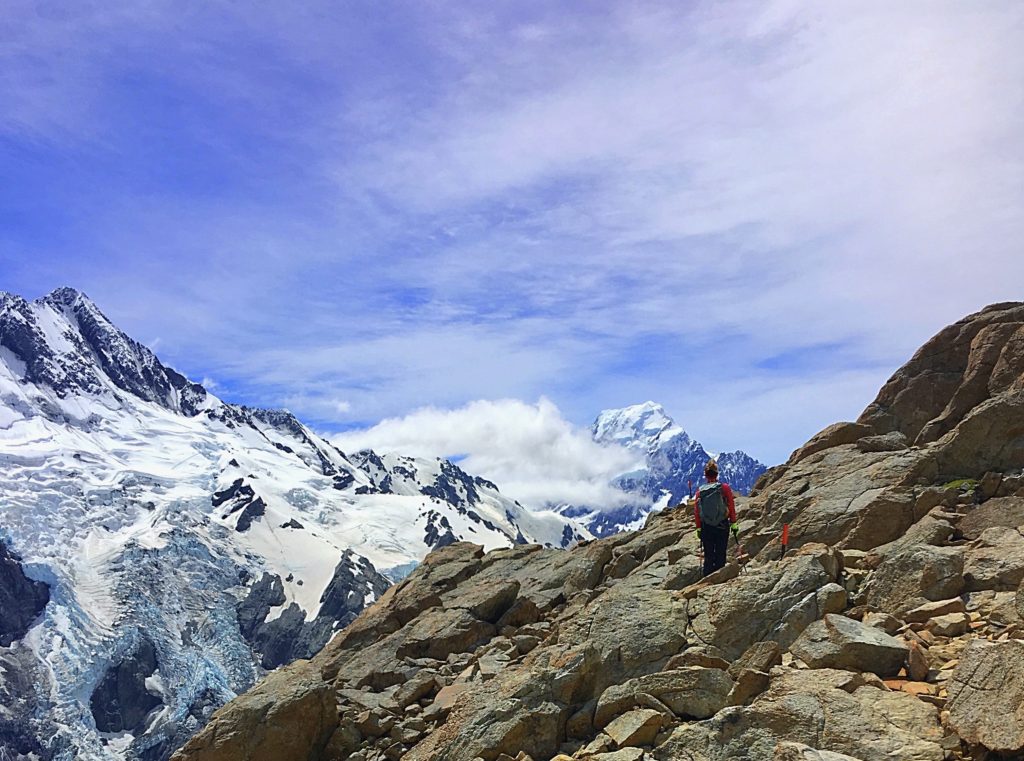
We also really enjoyed The Kepler Track, in Fiordland National Park and the Mueller Hut Route in Mt. Cook National Park. Very different scenery from the Milford Track. If you get the chance, do them as well! You can read my trip reports on them here:
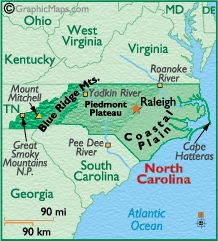
·      NZ: Backpacking The Kepler Track in 2-Days

·      NZ: The Mueller Hut Route in Mt. Cook National Park